Using Webhooks
Webhooks are HTTP callback functions that enable Orkes Conductor to interact with external systems in real time. When an event occurs on an external platform, a webhook sends event data to Conductor. This enables:
- Workflows containing a Wait for Webhook task to receive incoming webhook events.
- To trigger other workflows in response to incoming webhook events.
Orkes Conductor supports webhook integration with the following platforms:
- GitHub
- Microsoft Teams
- SendGrid
- Slack
- Stripe
- Custom (any other platform)
This guide explains how to integrate Webhook with Orkes Conductor. Here’s an overview:
- (Optional) Create a workflow with a Wait for Webhook task.
- Create a webhook in Orkes Conductor.
- Create a webhook in the source platform and verify the Conductor webhook URL.
- Verify that Conductor received webhook events.
Before you begin
Webhook events can interact with workflows in different ways. Determine how you want webhooks to interact with your workflows:
- If a workflow must wait for a specific webhook event: Create a workflow that includes a Wait for Webhook task with input matches defined based on the expected webhook payload. Proceed to Step 1.
- If a webhook event must trigger a new workflow: Configure the webhook to start a separate workflow when the event is received. In this case, you can skip Step 1, and proceed directly to Step 2.
- If you need both behaviors: Configure the webhook to send its payload to the workflow containing a Wait for Webhook task while also triggering a separate workflow. Proceed to Step 1
Step 1: (Optional ) Create a workflow with Wait for Webhook task
Follow this step only if your workflow must wait for a specific webhook event. If you want webhook events to start new workflows instead, skip to Step 2.
To create a workflow:
- Go to Definitions > Workflow from the left menu on your Orkes Conductor cluster.
- Select + Define workflow.
- In your visual workflow builder, select the (+) icon and add a Wait for Webhook task.
- Configure the input matches based on the incoming webhook payload fields you want to match.
- Save the workflow definition.
Run the workflow before the webhook event is received. The workflow will pause at the Wait for Webhook task and resume only when an incoming event matches the configured input matches.
Step 2: Create a webhook in Orkes Conductor
The next step is to create a webhook in Orkes Conductor.
To create a webhook:
- Go to Definitions > Webhooks from the left menu on your Orkes Conductor cluster.
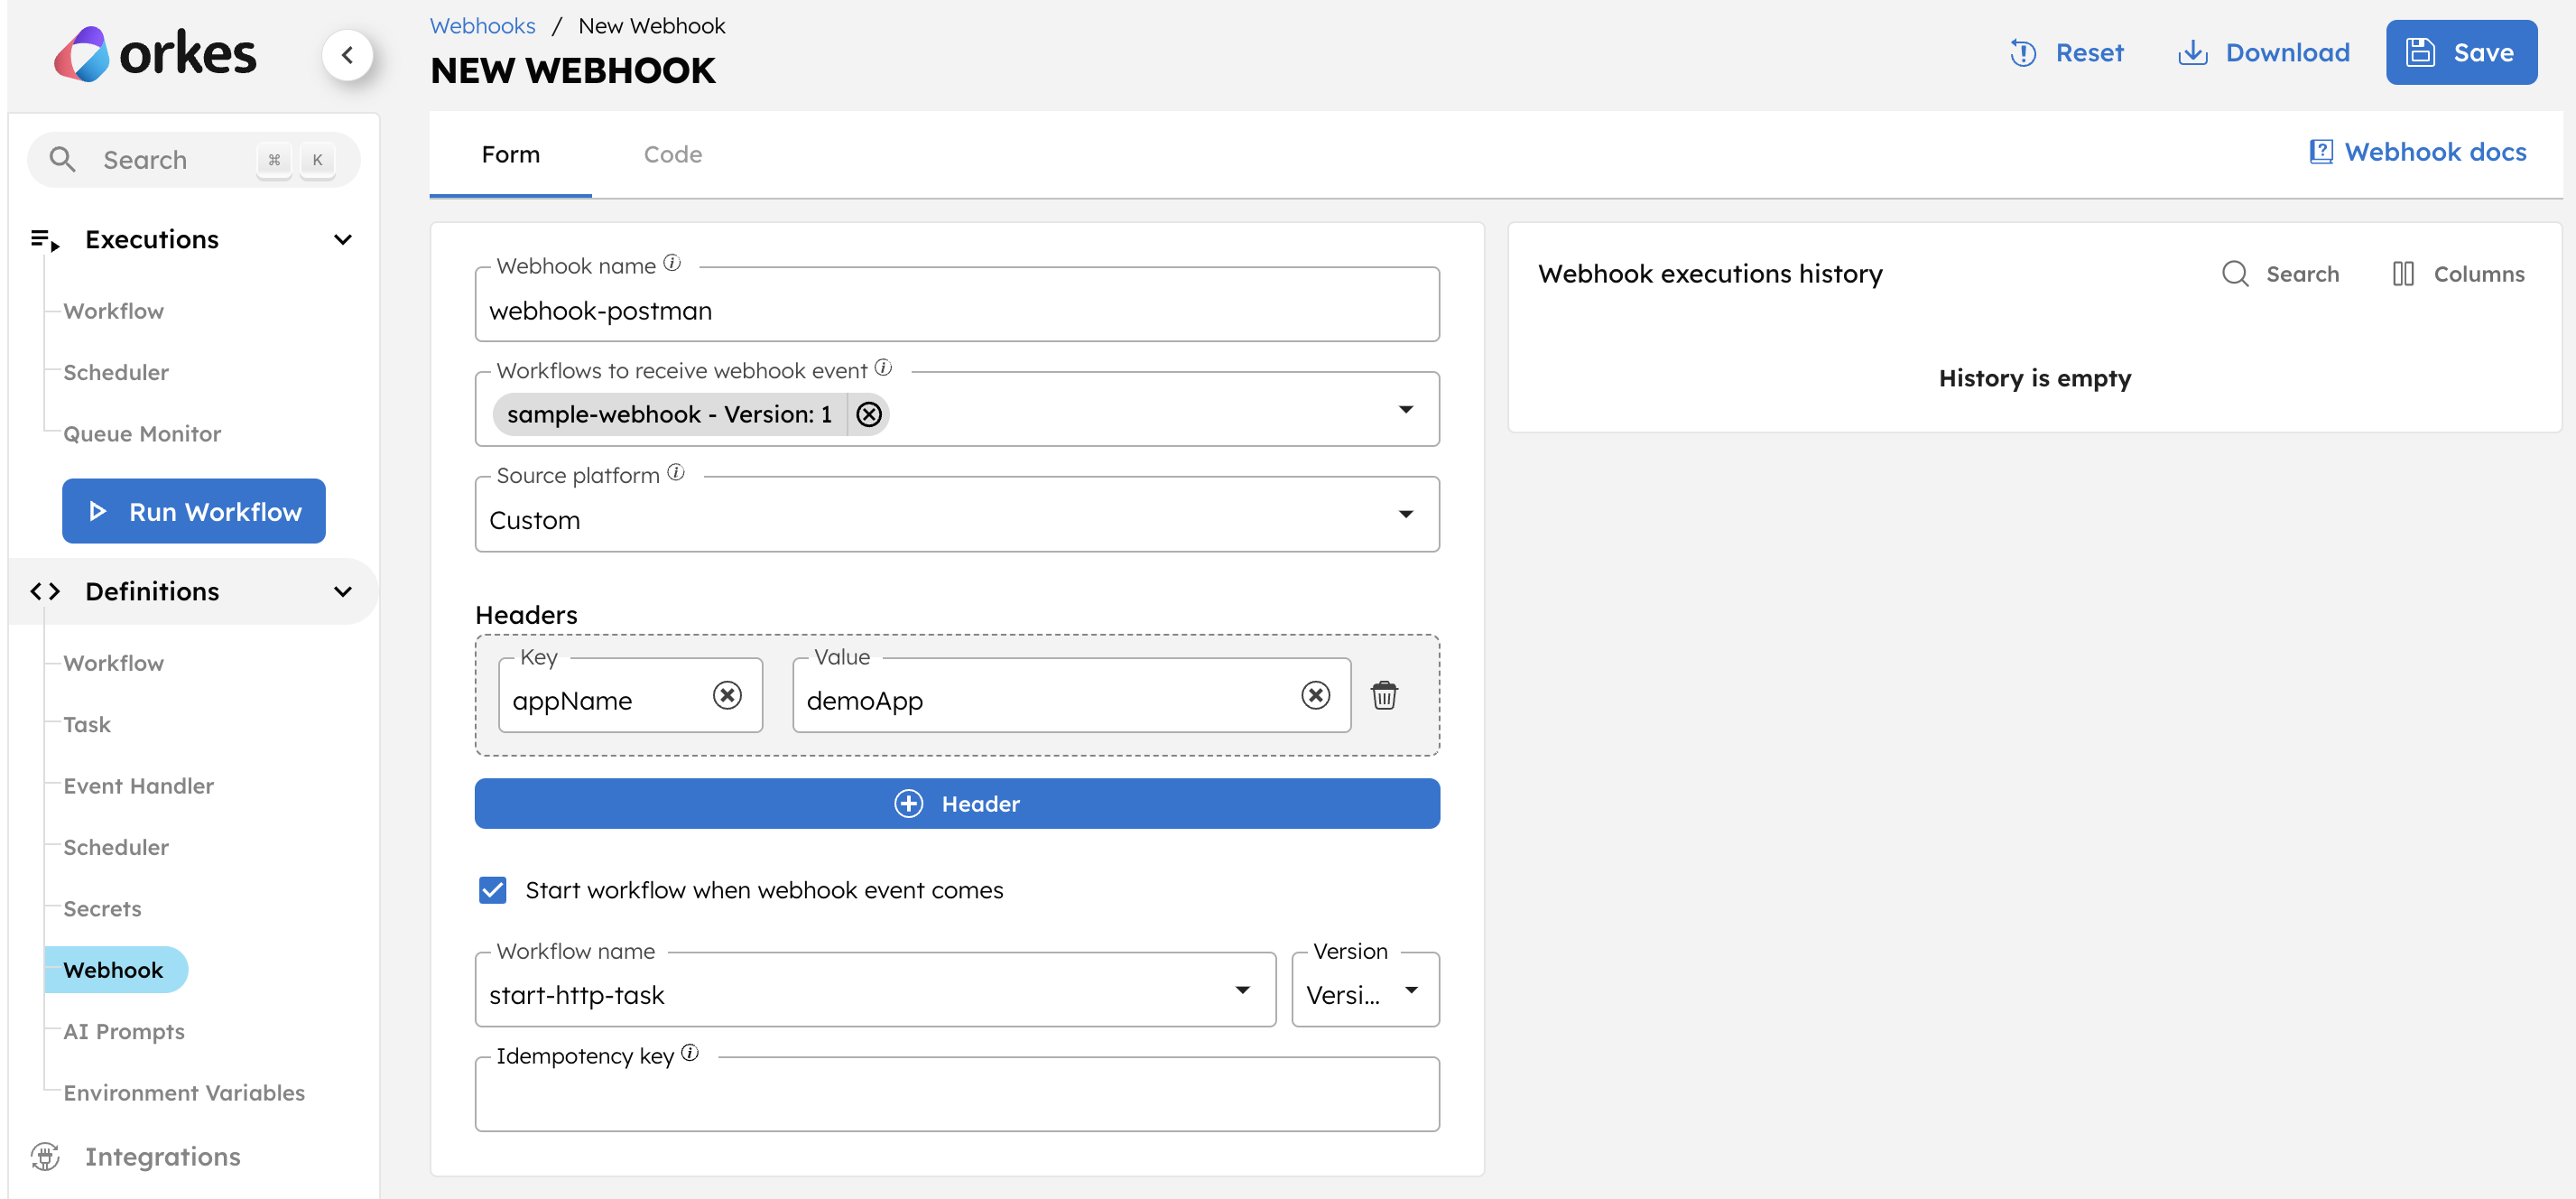
- Select + New webhook.
- Configure the following details:
| Parameter | Description |
|---|---|
| Webhook name | A unique name for the webhook. |
| Workflow to receive webhook event | The workflow that must receive the incoming webhook event, which is the one you created in Step 1. If the webhook is intended to start a new workflow, leave this field blank. |
| Source platform | Select the platform that will send webhook requests to Conductor. This selection does two things:
|
| Start workflow when webhook event comes | Enable this option to automatically start a workflow using the payload received from the webhook event. Once enabled, you must specify the workflow name, version, and optionally an idempotency key. You can pass the idempotency key as a variable, but only variables from the workflow input are supported, for example, ${workflow.input.someKey}. See example.When the webhook event is received, its payload is passed as input to the started workflow. |
When both the options, Workflow to receive webhook event and Start workflow when webhook event comes, are configured, the webhook payload will be sent to both workflows.
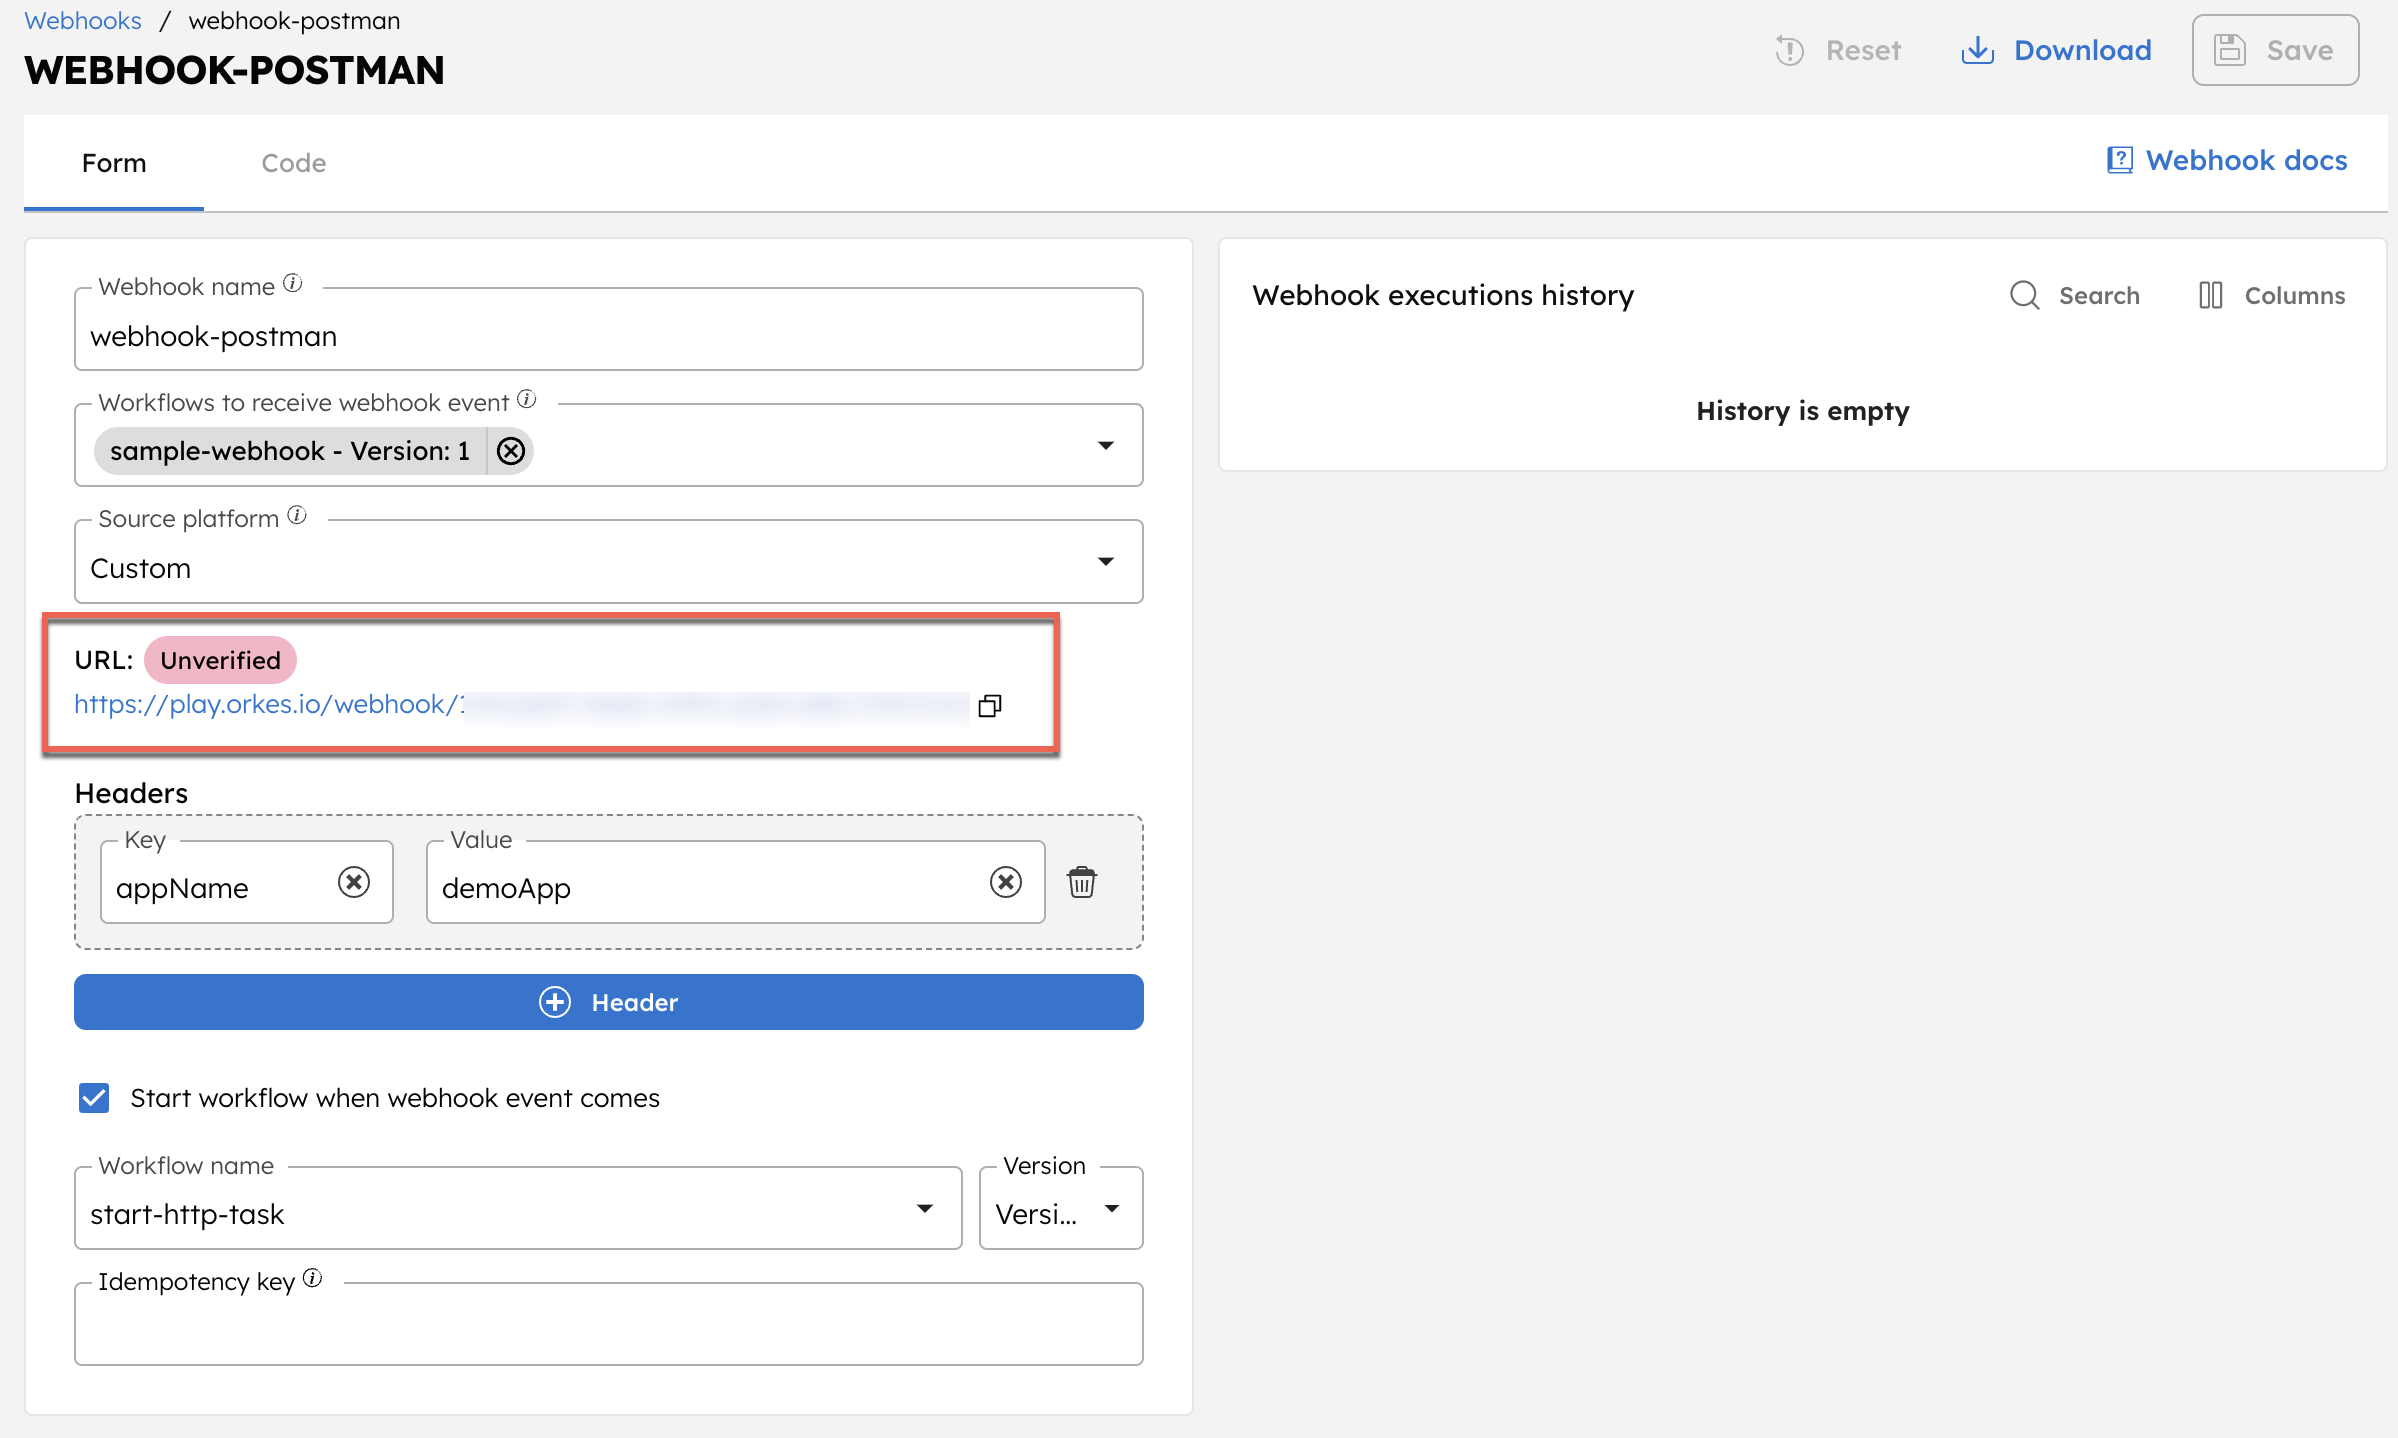
- Select Save.
An unverified webhook URL will be generated.
Here is the JSON schema for a webhook:
 {
 "name": "custom",
 "id": "a76c3079-fd0b-11f0-abcsjnekjndejde",
 "receiverWorkflowNamesToVersions": {
   "sample-webhook-postman": 1
 },
 "workflowsToStart": {
   "http": 1
 },
 "urlVerified": false,
 "sourcePlatform": "Custom",
 "verifier": "HEADER_BASED",
 "headers": {
   "Key": "Value"
 },
 "secretValue": "***",
 "createdBy": "john.doe@acme.com"
}
Step 3: Create a webhook in the source platform and verify the Conductor webhook URL
After you save a webhook, Conductor generates a webhook URL with status Unverified. The URL becomes Verified after Conductor completes verification for the selected source platform.
Verification methods
Conductor supports the following verification methods:
- Header-based verification: Validates incoming requests by checking for headers and their expected values. The incoming request must match all headers and values as specified in Conductor; otherwise, it will be ignored. The URL is marked as verified when the first matching request is received.
- Challenge-based verification: Used when the external system sends a challenge request to which the Conductor server responds to establish trust. The URL is marked as verified once this challenge response is completed. Until then, all incoming requests are ignored.
- Signature-based verification: Validates the payload signature. This validation requires configuring the secret or key on the Conductor side. When the request comes, it must match the pre-configured secret or header value in Conductor, and then the URL is marked as verified.
Verification depends on the selected source platform. Use the following table to understand how each verification method is completed and when Conductor marks the URL as verified, along with end-to-end examples.
Header-based verification
| Platform | What you must do to verify webhook URL | Examples |
|---|---|---|
| Custom |
|
Challenge-based verification
| Platform | What you must do to verify webhook URL | Examples |
|---|---|---|
| Slack |
|
Signature-based verification
| Platform | What you must do to verify webhook URL | Examples |
|---|---|---|
GitHub: Uses the X-Hub-Signature 256 header. |
| Build a GitHub Pull Request Reviewer Assignment Workflow |
Microsoft Teams: Uses the hmac base64-encoded-signature header. |
| Build a Microsoft Teams Webhook Processing Workflow |
SendGrid: Uses the X-Twilio-Email-Event-Webhook-Signature header. |
| Using SendGrid Event Webhooks in Orkes Conductor |
Stripe: Uses the Stripe-Signature header. |
| Build a Stripe Payment Confirmation Workflow |
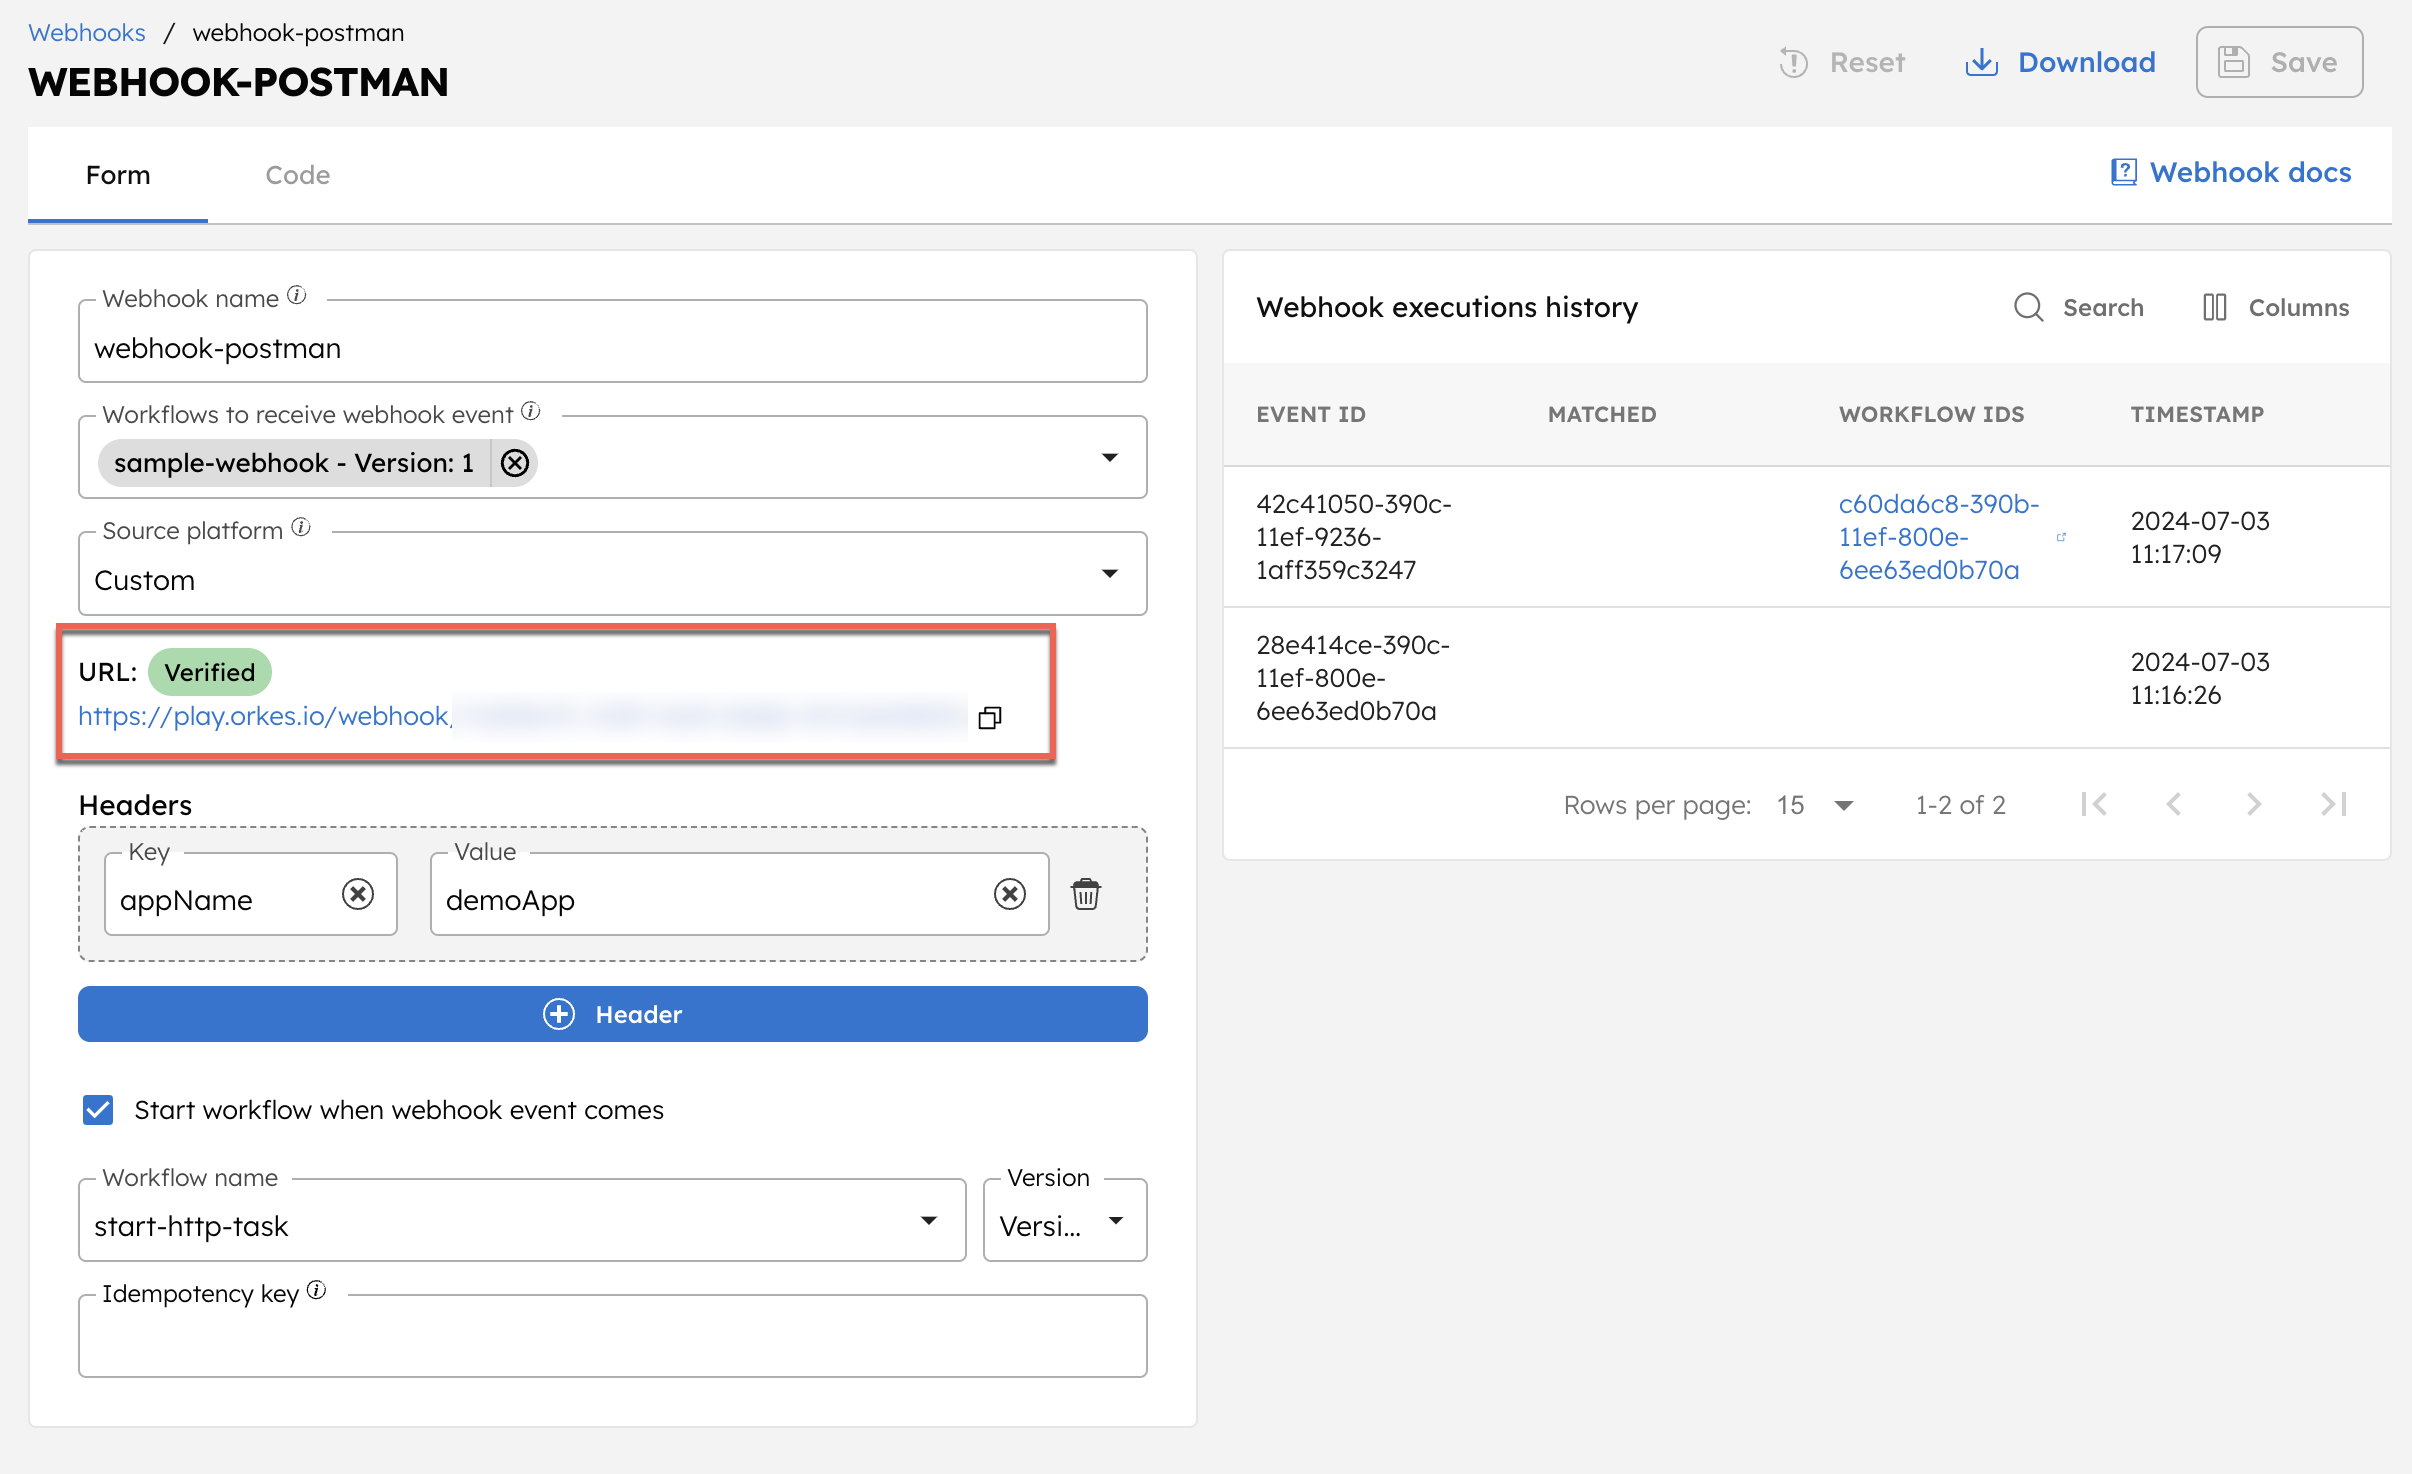
Once the URLs are verified (using the respective verification method), the URL status will be marked as Verified in Conductor.
Step 4: Verify that Conductor received webhook events
The incoming webhook payload triggers the workflow in different ways, depending on your configuration:
- If the workflow is waiting for a specific webhook event: After you run the workflow, it pauses at the Wait for Webhook task. When the expected event is received with matching inputs, the webhook task is completed, and the workflow continues automatically. Refer to an example waiting for a cURL request.
- If the webhook is configured to start a workflow: Conductor can automatically start the workflow when a webhook event is received. The event payload will be passed as input to the specified workflow.
- If both options are configured: When you configure both Workflow to receive webhook event and Start workflow when webhook event comes, Conductor sends the webhook payload to both workflows.
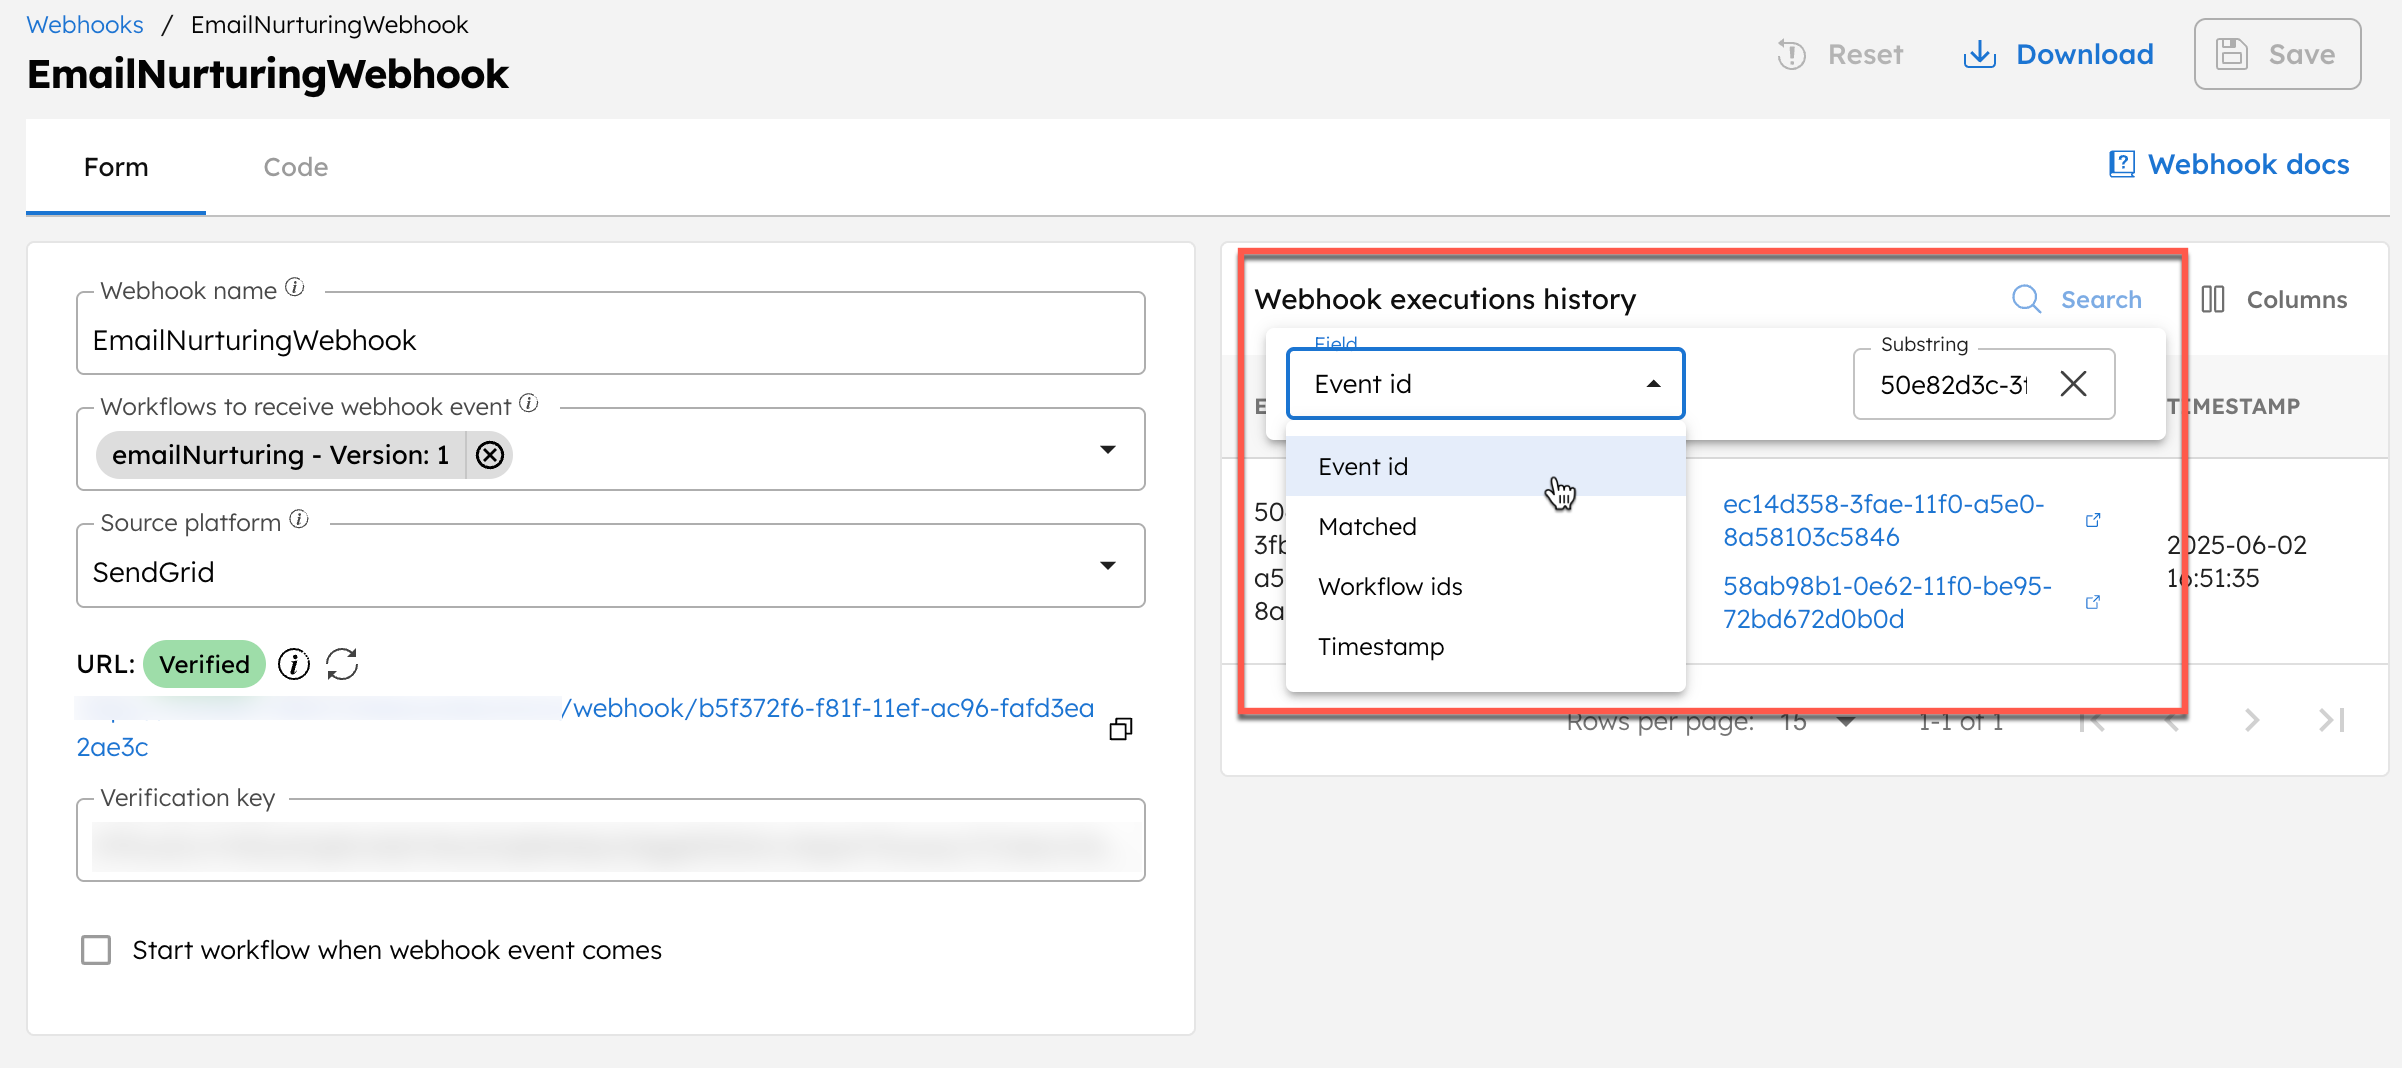
To verify that the webhook events have been received by Conductor, open the webhook by navigating to Definitions > Webhook, and access the webhook execution history.
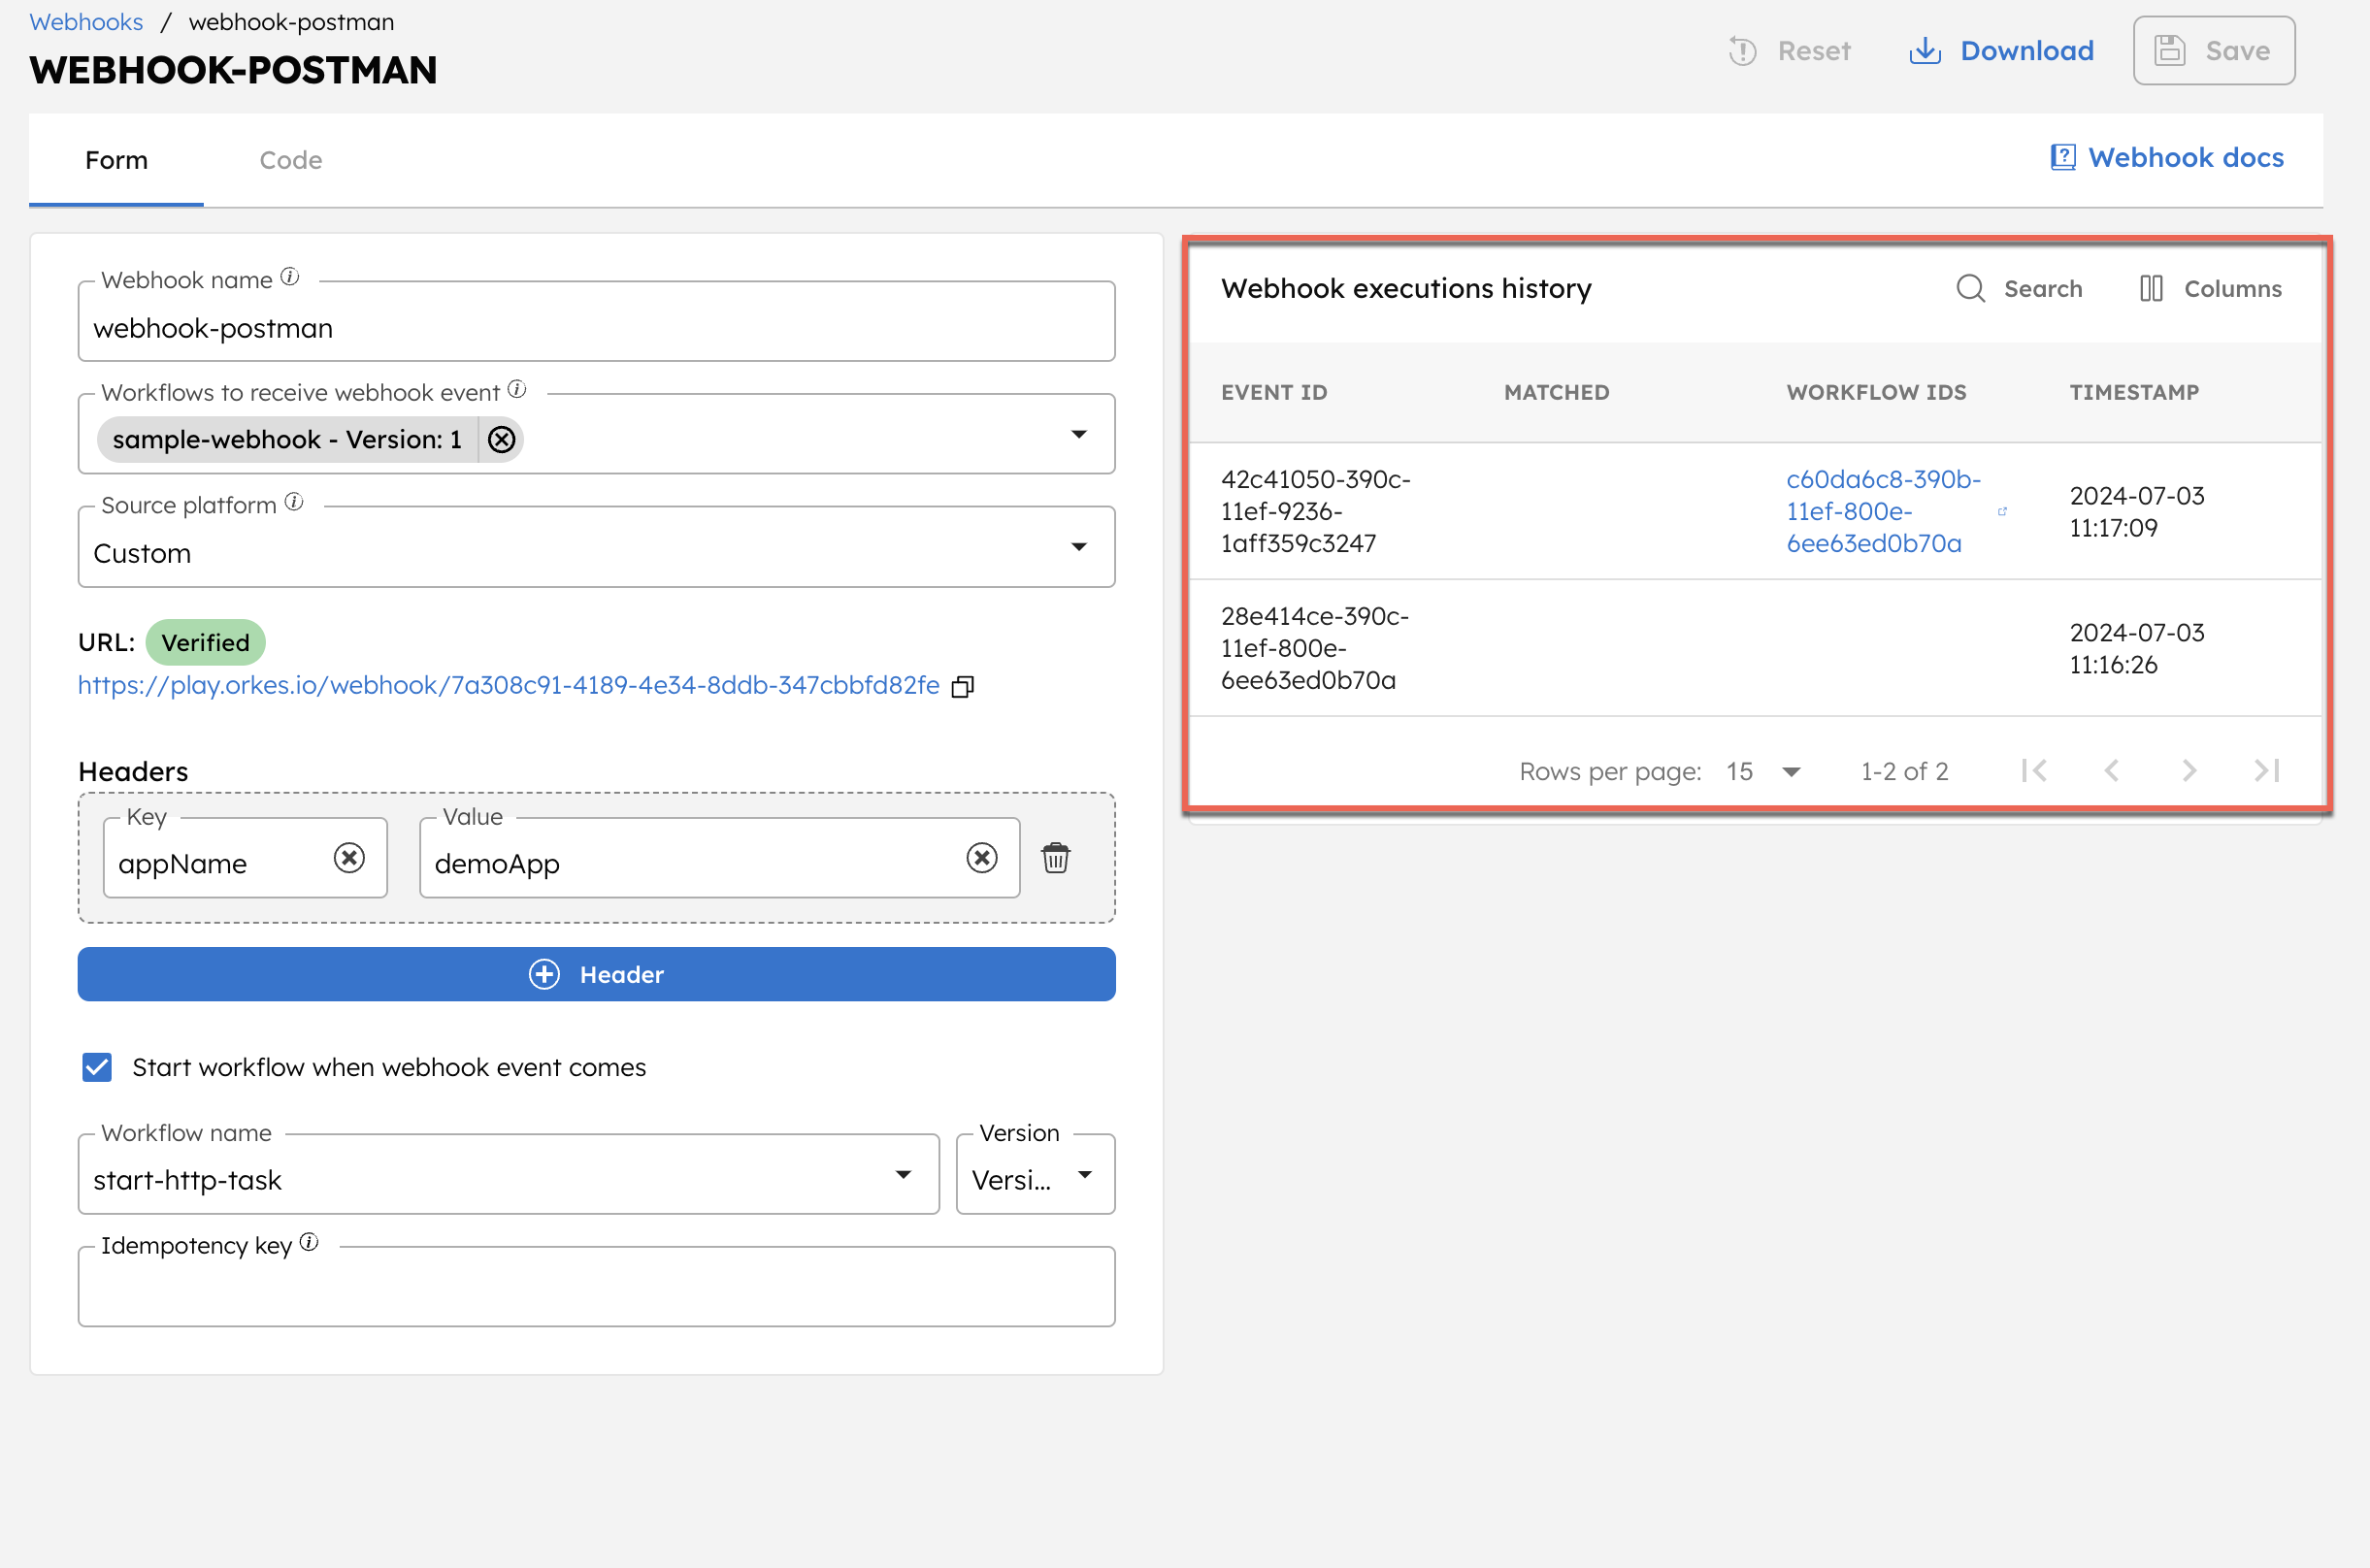
This includes details such as the event ID, whether the headers are matched, the triggered workflow (execution) IDs, and the timestamp of when the event was received.
You can also use the search option to filter results based on these parameters.